Easter Bunny Biscuits for Dogs

Easter Bunny Dog Treats | Pretty Little Pastimes


Before everyone found the last egg in the hunt, I wanted to share with you a recipe that is sure to please that hopping, four-legged, bushy tailed animal that is enjoying Easter right along with you. And, no, I don’t mean the Easter Bunny!

Whenever I celebrate a holiday where I plan to indulge a little, I try to whip up something for my two pups to enjoy right along with me. They share my life each and every day, so why not include them in the joy of holiday festivities? With a quick and simple recipe like my Peanut Butter & Oatmeal Dog Treats (here, with a couple of changes) your dogs will be just as excited to see the Easter Bunny … and not just because they want to chase him around the yard.

Beef & Cheddar Dog Treats

  • 1/2 cup peanut butter *
  • 1/4 cup honey
  • 1 tablespoon olive oil
  • 3/4 cup shredded cheddar cheese
  • 1 cup beef broth
  • 1 cup rolled oats
  • 1 cup whole wheat flour
  • 1 cup unbleached flour
  • 1/4 plain yogurt (optional, for bunny tail decoration)

*Be sure to not use peanut butter containing xylitol. The ingredient is not harmful to humans, but is toxic for dogs.

Preheat your oven to 350 degrees. In a mixing bowl, whisk together the peanut butter, honey, olive oil and beef broth. In a separate bowl, combine the flours, oats, and cheddar. Slowly mix the dry ingredients into the peanut butter mixture until combined. If your dough is too dry add more beef broth one tablespoon at a time.

Easter Bunny Dog Treats | Pretty Little Pastimes

Transfer the dough to a flour dusted surface and roll the dough to about 3/8″ thick. Use a cookie cutter (I used a bunny shape) and cut out your treats. Combine the scraps and keep rolling to get as many treats as you can out of the dough; I ended up with 26. Place the unbaked treats onto a parchment lined cookie sheet and bake for 13-15 minutes. Remove from the oven and transfer to a wire rack to cool completely. Using a small pipping bag, place a small dollop of plain yogurt as a “bunny tail” on each treat. Place the treats directly into the refrigerator until the yogurt is hardened, about 30-45 minutes. Serve chilled or at room temperature (yogurt will remain hardened).

Easter Bunny Dog Treats | Pretty Little Pastimes

My pups love it when the Easter Bunny leaves them some homemade treats in their baskets and I am sure yours will too! Happy Hoppy Easter, everyone!

Easter Bunny Dog Treats | Pretty Little Pastimes


Happy 4th of July!

Raspberry Blueberry Scones I Pretty Little Pastimes

Happy Birthday, America; you don’t look at day over 200!

If you are anything like me, than not only do you love a good themed part, but you also LOVE themed baking! I couldn’t resist baking up a little red, white, and blue breakfast to start our Fourth of July celebration. This was my very first attempt at making a homemade scone and it will certainly not be the last. They were flavorful, flakey, and just the right amount of sweetness for me. With a dollop of fresh whipped cream, I would also gobble one of these up for dessert. In fact, I am already thinking about different flavor combinations I can bake up in the future … orange blueberry, cranberry almond, chocolate-anything … yum!

Red Raspberry & Blueberry Scones

  • 2 cups all purpose flour (reserve a little extra for work space)
  • 1/2 cup granulated sugar
  • 1 tablespoon baking powder
  • 1/4 teaspoon salt
  • 1/2 cup unsalted butter
  • 1 large egg
  • 1/2 cup sour cream (or Greek yogurt)
  • 1 teaspoon pure vanilla extract
  • 1/2 teaspoon almond extract (optional)
  • 1/2 cup of fresh raspberries, halved
  • 1/2 cup of fresh blueberries
  • 1 tablespoon lemon zest (optional)
  • natural honey drizzle (optional)

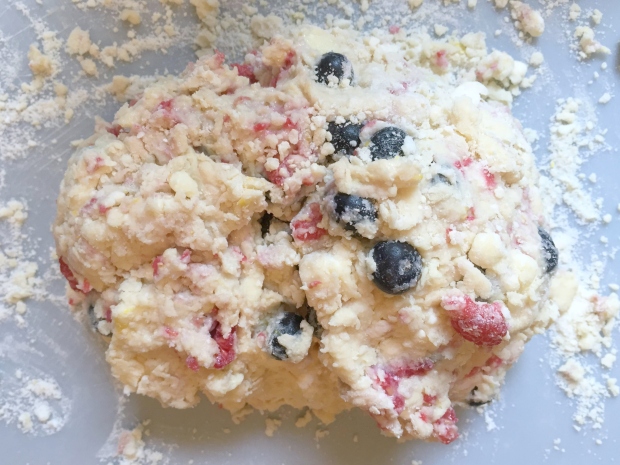
Preheat oven to 400 degrees. In a large mixing bowl, whisk together the flour, sugar, baking powder, and salt. Add the butter and cut into mixture. I use two forks to break up the butter and then my hands to further knead it in. Don’t worry about catching every small piece of butter, some larger pieces are just fine.

In a small mixing bowl wish together the egg, sour cream (or Greek yogurt), vanilla extract, and almond extract until smooth. Pour the wet ingredients over the flour mixture. Fold until just combined, being careful not to over mix. Gently fold in the berries and lemon zest.

Sprinkle flour onto your work station and turn the dough onto the surface. Knead it into an 8-inch round. If the dough is too wet to work with, add a little more flour. If it is too dry, add a small splash of milk.

With a large knife, slice the dough into 8 equal sized pieces (like a pizza). Using a flat spatula, transfer the wedges to a baking sheet lined with parchment paper. Make sure dough is at least 2 inches apart to allow for the dough to spread while baking.

Bake for 15-18 minutes or until very lightly golden. Allow scones to cool for 5 minutes and then transfer to a wire cooling rack. Once cooled (if they last that long), drizzle with a little all natural honey and enjoy!

Raspberry Blueberry Scones I Pretty Little Pastimes

Raspberry Blueberry Scones I Pretty Little Pastimes

Wishing each of you a very Happy Fourth of July!

Pitaya Superfruit Smoothie

Pitaya Smoothie I Pretty Little Pastimes

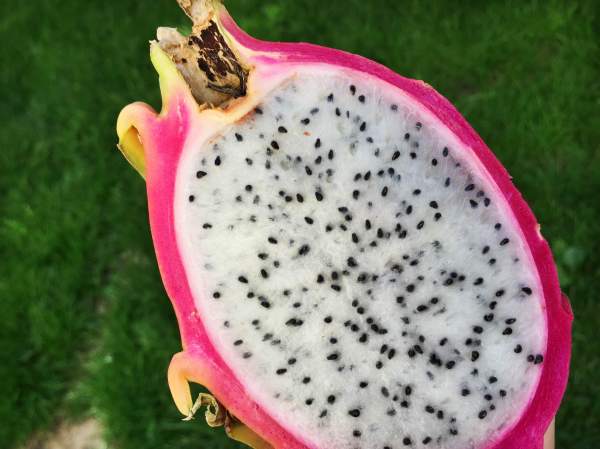
If you are lucky enough to pass by fresh pitaya at your local grocery store or market, stop immediately! Grab one of those vibrant beauties and put it in your basket! This superfruit is not only packed with antioxidants, it also carries a slew of vitamins and minerals. And don’t let the color or prickly skin fool you, the taste is actually quite mild (think kiwi) and is perfect to add to your favorite smoothie/breakfast bowl recipes.

When shopping for pitaya, commonly referred to as dragon fruit, choose a fruit that is vibrant and gives slightly to pressure. It can be a little tricky to find, but is usually kept in the exotic fruit section in the produce department. Similar to acai, food markets are now selling frozen packs as well. Keep an eye out!

Pitaya Superfruit Smoothie

  • 1 ripe pitaya
  • 1 small ripe banana
  • 1/2 cup mango
  • 4 ounces pineapple juice
  • 4 ounces coconut milk
  • drizzle of natural honey (optional)

Place all ingredients in a high speed blender (liquids first) and blend until smooth. Yep, that’s it! Transfer to your favorite glass or tumbler and serve immediately.

*If you prefer a thinner smoothie, simply add additional pineapple juice. If you like it thicker, add another handful of fruit.

There is nothing like feeling energized and refreshed after nourishing your body with something healthy AND tasty. Whether you add it into your breakfast routine or use it to recharge after a long workout, this pitaya smoothie is a must try. Enjoy!

National Peanut Butter Lover’s Day 2015

Peanut Butter Chia Overnight Oatmeal I Pretty Little Pastimes

It’s that time again! The day is here that we get to set aside special time to celebrate the creamy (or crunchy) wonder that is PEANUT BUTTER! I was scratching my head Saturday night thinking of a way to incorporate my favorite all-natural peanut butter into my breakfast routine. So I decided to mix it into some oatmeal and voila! Peanut Butter & Chia Overnight Oats. Enjoy!

Peanut Butter & Chia Overnight Oats

  • 2/3 cup skim or almond milk
  • 1/4 cup steel cut oats
  • 1 tablespoon chia seeds
  • 1 and 1/2 tablespoons peanut butter
  • 1/4 teaspoon pure vanilla extract
  • 1/2 teaspoon honey
  • fresh blueberries or banana

Mix together the milk, oats, chia, vanilla and one tablespoon of peanut butter and place in the refrigerator overnight (or at least 4 hours). In the morning stir to incorporate and top with remaining peanut butter, honey and fresh fruit. I packed mine in a mason jar so it I could grab it on my way out the door.

Blood Orange, Salted-Dark Chocolate Chip Cookies

Blood Orange, Salted-Dark Chocolate Chip Cookies

Blood Orange, Salted-Dark Chocolate Chip Cookies I Pretty Little Pastimes

The chocolate chip cookie, a classic that we all grew up eating hot out of the oven with a cold glass of milk, right? Well, consider this a grown up version of your favorite go-to cookie. This Dark Chocolate Chip Cookie has all the sweetness you remember, with an added citrus zing and sea salt finish. What’s not to love about that?

Next time you find yourself face-to-face with Blood Oranges, grab some of these colorful cuties and add them to your favorite orange recipes. I can’t wait to try them in some frosty beverages for a pop of color and tartness! But for now I will take my Blood Oranges with a dose of chocolate!

Blood Orange, Salted-Dark Chocolate Chip Cookies

  • 2 sticks butter, room temperature
  • 3/4 cup brown sugar, packed
  • 1/2 cup pure granulated sugar
  • 2 eggs
  • 1 and 1/4 teaspoons pure vanilla extract
  • 2 tablespoons blood orange juice
  • zest of one medium blood orange
  • 2 and 1/4 cups flour
  • 1/4 teaspoon salt
  • 1/2 teaspoon baking soda
  • 5 ounces dark chocolate chips
  • sea salt for garnish (optional)

In a small bowl combine flour, salt and baking soda. Set aside.

In a large mixing bowl, cream together butter and sugars until fluffy, about 5 minutes. Incorporate eggs, one at a time, until combined. Add vanilla, zest and blood orange juice. Mix until evenly distributed.

Slowly add in the flour mixture, stirring to combined. Once thoroughly mixed, stir in the dark chocolate chips (be careful not to over-mix).

Refrigerate the dough for 20 minutes.

Preheat oven to 350 degrees. Drop the chilled dough onto a cookie sheet covered with parchment paper. Bake for 8-10 minutes, or until edges are slightly golden brown. Remove the cookie sheet from the oven and let sit for 2 minutes before transferring the cookies to a wire rack.

Sprinkle tops with a small amount of sea salt and enjoy!

Blood Orange, Salted-Dark Chocolate Chip Cookies I Pretty Little Pastimes

Blood Orange, Salted-Dark Chocolate Chip Cookies I Pretty Little Pastimes

Pumpkin Pecan Bread Pudding with Whiskey Cream

Pumpkin Pecan Bread Pudding I Pretty Little PastimesWe are only three days into the new year and we have already seen our first blizzard! With temperatures falling into negative digits today, I decided it was time to share a warm and tasty dessert that will help make you forget about all that snow piling up outside!

Combing through my pantry after the holidays I always seem to find a random can of this and that, that never got used during my holiday baking. Today it was the giant can of pumpkin puree that I skipped over during Thanksgiving. I know the “pumpkin everything” season has ended at our local coffee shops, but that doesn’t mean that I am quite ready to give it up completely. This weather is perfect for a hot pumpkin bread pudding and why not add a Jameson-spiked whiskey sauce? It is a snow day after all.

Pumpkin Pecan Bread Pudding

  • 4 large eggs
  • 1 (30 oz.) can of pumpkin puree
  • 1 & 1/2 cups milk
  • 1 cup half & half
  • 1 cup pure granulated sugar
  • 1/2 teaspoon salt
  • 1 teaspoon cinnamon
  • 1/2 teaspoon nutmeg
  • 1/2 teaspoon pure vanilla extract
  • 1 loaf of French bread (about 12 oz.)

Pecan-Caramel Sauce

  • 1 cup chopped pecans
  • 1 cup light brown sugar, firmly packed
  • 1/2 cup butter
  • 1 tablespoon light corn syrup
  • 1 teaspoon pure vanilla extract

Cut the French bread into 1 inch pieces and set aside in a large bowl. In another large bowl, whisk together eggs, pumpkin, milk, half & half, sugar, salt, cinnamon, nutmeg and vanilla, until well blended. Pour the pumpkin mixture over the bread and stir to coat evenly. Cover will plastic wrap and let chill for 8-12 hours.

Pumpkin Pecan Bread Pudding I Pretty Little Pastimes

Waiting 8 hours might seem like torture once you smell this, but you can do it!

Pumpkin Pecan Bread Pudding I Pretty Little Pastimes

Preheat oven to 350 degrees. Spoon chilled bread mixture into a lightly greased 13×9 inch baking dish. Cover with foil and bake for 35 minutes. Remove the foil and bake an additional 15 minutes. During the last 15 minutes of baking, prepare the pecan-caramel sauce. 

Heat the pecans in a skillet over medium-low heat, stirring often, 3-5 minutes or until lightly toasted and fragrant. Cook brown sugar, butter and corn syrup in a small saucepan over medium heat, stirring occasionally until sugar is dissolved, about 3-4 minutes. Remove from heat and stir in vanilla and pecans.

Remove bread pudding from oven and drizzle with the Pecan-Caramel Sauce. Return the dish to the oven and bake for 5 minutes longer or until sauce is thoroughly heated and begins to bubble.

Now it is time to make the whiskey sauce.

Whiskey Cream Sauce

  • 2 & 1/2 cups milk
  • 1/4 teaspoon nutmeg
  • 1 vanilla bean split lengthwise (or 1 teaspoon pure vanilla extract)
  • 2 tablespoons unsalted butter
  • 1/4 cup flour
  • 2 tablespoons pure granulated sugar
  • 2 large egg yolks
  • 2 tablespoons milk
  • 3 tablespoons whiskey (I used Jameson Irish Whiskey)

Pour the milk into a saucepan and add the nutmeg. Scrape the seeds from the vanilla bean add to the milk with the bean. Heat gently until small bubbles appear around the edge of the saucepan. Set aside to cool, then strain the milk and discard the bean.

Melt the butter in a saucepan over low heat. Sprinkle the flour over the butter and cook, stirring continuously with a wooden spoon for 1-2 minutes. Be careful not to allow the mixture to color.

Remove from heat and slowly add the vanilla milk, whisking vigorously to avoid lumps. Return to low heat and bring to a boil, stirring constantly. Add the sugar and simmer for 3-4 minutes.

In a bowl, stir together the yolks and milk. Pour in a quarter of the, now hot, sauce, stir together to blend and return the mixture to the remaining sauce in the pan. Add the whiskey and stir constantly over medium-low heat until heated through, without allowing the sauce to boil. Finish by straining.

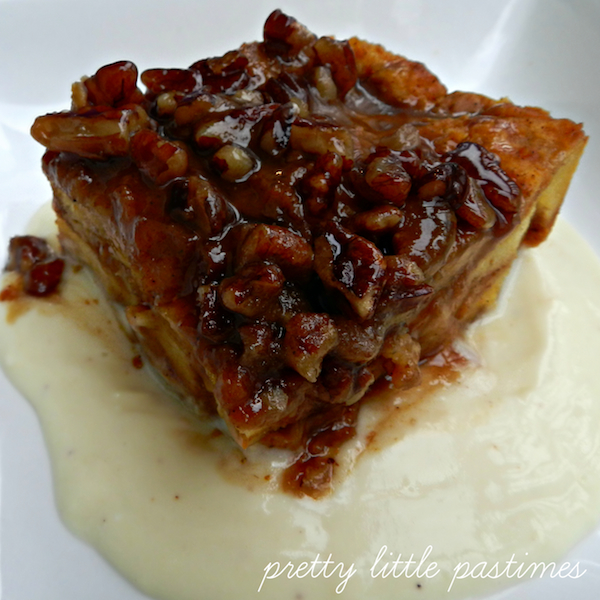
While everything is still hot, spoon a portion of the whiskey sauce onto the bottom of a plate. Layer the bread pudding directly over the sauce and, if desired, top with fresh whipped cream. This recipe might not shovel your driveway, but it will help make this bitter-cold weather a little more bearable. Now, curl up under a big blanket on the couch and enjoy!

Pumpkin Pecan Bread Pudding I Pretty Little Pastimes


Whiskey Sauce recipe source: Christmas by Le Cordon Bleu

Apple Pie Smoothie

Apple Pie Smoothie I Pretty Little PastimesIt took me a few weeks to come to terms with the fact that summer was really over and that fall was here. It’s not that I don’t enjoy fall, beautiful foliage, new boots and pumpkin EVERYTHING, I mean, what’s not to love? It’s just knowing what comes next … ugh, winter! I have survived four winters since leaving California, so you would imagine that I would be beginning to accept it’s existence, but, alas, I am still in denial.

Rather than sulk as I pack away my sundresses and swimsuits, I decided to embrace fall and try my hand at a couple of new adventures. The first was apple picking! A group of friends and I made the trek to Russell Orchards in Ipswich, MA for a day of hay rides, cider doughnuts, and wine tasting. I’m sure they could all tell that I was the orchard newbie when I cringed at the idea of taking one bite out of an apple and throwing the rest on the ground. I guess that “don’t be a litter bug” mentality it ingrained deep inside. Once I saw a bunch of bees happily taking care of the discarded apples, I felt much better. By the end of the day, I had a huge bag apples, fresh cider, homemade jam and even a mini pumpkin to take home. Success!

Apple Picking I Pretty Little Pastimes

As I make my way through my stock pile of apples, I will continue to share recipes and photos. I will start with a simple (and tasty) apple pie smoothie. Oh, and if you have any must-try apple recipes for me, please send them my way!

Apple Pie Smoothie

  • 3/4 cup water
  • 1/2 cup milk (I used almond milk)
  • 1/3 cup old fashioned oats
  • 1/3 cup vanilla yogurt
  • 1 teaspoon chia seeds
  • 1 apple, sliced and cored
  • 1 banana, frozen
  • 1 teaspoon cinnamon (or to taste)
  • 1/2 teaspoon nutmeg (or to taste)
  • handful of ice cubes

Add all ingredients into a high speed blender. Blend until smooth. Add additional ice cubes until desired consistency.

For cinnamon sugar rim: Dip glass rim onto a shallow dish of water. Mix 1/4 cup brown sugar and 1 teaspoon cinnamon onto a flat plate. Dip moistened rim into sugar mixture, shaking off excess. Garnish with an apple slice and enjoy!

Immunity Boost Smoothie

Immunity Boost Smoothie I Pretty Little PastimesJust when I thought I was out of the woods, after a long fight with seasonal allergies, a new bug got ahold of me this week. Everyone around me seemed to be catching the virus, so I new it was a matter of time before the scratchy throat and stuffy nose found its way to me. When I am sick, I tend to be very stubborn. I usually refuse any cold medicine and just try to let me body fight the sickness on its own. I find that when I pay closer attention to how my body feels in its natural state, then I can better judge when fevers are coming/breaking, when I am hungry and when I need more rest.

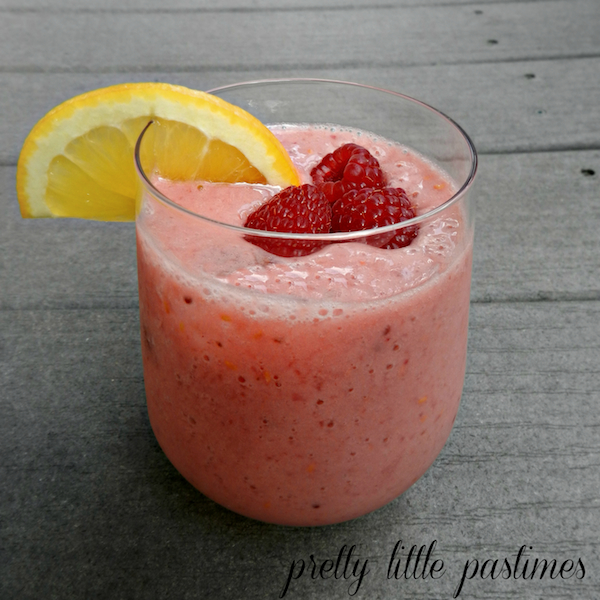
Since I did not have a lot of energy, I whizzed up this simple Immunity Boost Smoothie to give my system a little kick in the right direction. This smoothie is a combination of fresh raspberries (you can also use frozen), yogurt, bananas and orange juice. The Vitamin C, antioxidants and flavonoids found in the ingredients will help boost your immune system … plus it’s delicious!

Immunity Boost Smoothie

  • 1 cup vanilla yogurt – or vanilla soy milk
  • 1 cup fresh raspberries
  • 1 ripe banana
  • 1/2 cup orange juice
  • handful of ice cubes

Combine all ingredients in blender. Cover and blend until smooth.

This cold drink was just what I needed to get me through the rest of my day. When I find myself ill during the winter months, nothing sounds better than warm soup, but during the summertime I always turn to something cold. Try this smoothie next time you are looking for a quick boost or a tasty treat. Cheers to good health!


Maggie’s 3rd Birthday

Dog-friendly Birthday Cake Recipe I Pretty Little Pastimes

Less than a week into July and we have already celebrated two big occasions in our house, the Fourth of July and our pup Maggie May’s 3rd birthday! If you would have told me three years ago that I would be throwing puppy parties and baking dog-friendly cakes today, I would not have believed you. I never had pets growing up, except for the occasional short-lived goldfish, so I never really understood the close relationship you could develop with a four-legged friend. My two pups are a huge part of my family now and I could not imagine life without them! Nothing is better than coming home to those crazy wagging tails! I think it is safe to say that I have become a true dog lover, maybe even one of those “crazy dog ladies”. And I wouldn’t have it any other way!

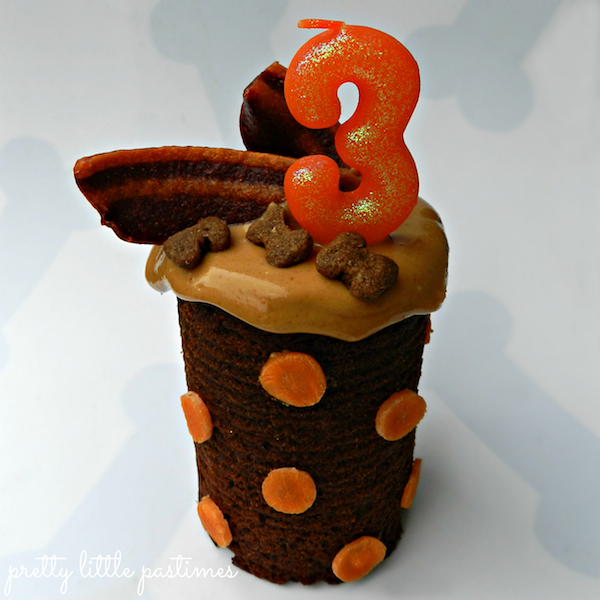
I have posted my favorite recipe for Happy Birthday Pupcakes, but wanted to share with you the full cake version that I used for her 3rd birthday. Since I did not have a mini cake pan, I improvised and used a basic tin can (the kind you will find any vegetable in at the grocery store) to create the shape I wanted. Keep in mind, you can use this technique for mini people-friendly cakes as well. Here is the recipe:

Dog-friendly Birthday Cake

  • 1 egg
  • 1/4 cup peanut butter
  • 1/4 cup vegetable oil
  • 1 teaspoon vanilla
  • 1/3 cup honey
  • 1 cup shredded carrots
  • 1 cup whole wheat flour (preferred) or white flour
  • 1 teaspoon baking soda
  • 1 14.5 oz. can, emptied
  • additional peanut butter, sliced carrots, bone shaped dog food and Beggin’ Strip brand dog treats for decorating

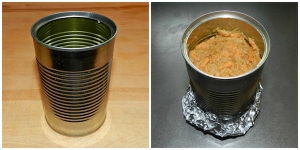
Start by emptying the contents of a 14.5 oz. can. Wash, rinse and dry completely. Carefully remove the top lid as well as the lip directly under it (removing the lip helps the cake to easily pop out after baking). Coat the inside of the can liberally with non-stick spray and wrap the bottom with tin foil. Place the can on a baking sheet and set aside.

Dog-friendly Birthday Cake Recipe I Pretty Little Pastimes

Preheat your oven to 350 degrees. In a mixing bowl, combine the egg, peanut butter, oil, vanilla, and honey. Blend well. Stir in the carrots and mix thoroughly. Sift flour and baking soda together and fold into batter. Fill the prepared can a little over 3/4 of the way full with the cake batter. As the cake bakes in the oven, it will rise above the top of the can, which you can remove later before decorating. Bake for 35-40 minutes or until cooked through. Remove from the oven and let cool completely.

Once cooled, turn the can upside-down and gently shake until the cake pops out. Trim the top of the cake, if desired, to get an even surface. Adhere carrot-coin polka dots by smearing a small amount of creamy peanut butter on back of each and pressing firmly onto the cake. Use additional peanut butter to frost the top of the cake. Add a Beggin’ Strip brand dog treat, bone shaped dog food pieces and candle on top to finish of the decorations.

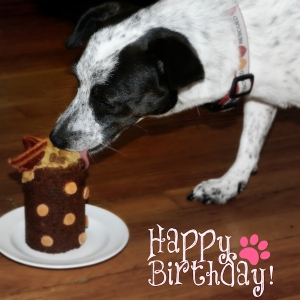
Dog-friendly Birthday Cake Recipe I Pretty Little PastimesMaggie loved her birthday cake! Between her and Bogey, they had it gobbled up in no time! Happy Birthday Maggie May!


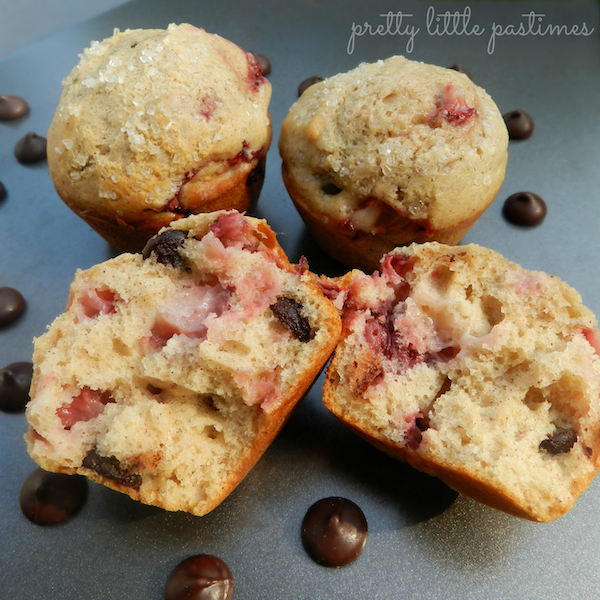
Chocolate-Covered Strawberry Muffins

Chocolate Covered Strawberry Muffins I Pretty Little Pastimes

Who doesn’t love chocolate-covered strawberries? They are one of those sweet treats that just make you feel like you should be celebrating over a cold glass of champagne. Well, it was a little early in the day for some bubbly, so I decided to try and work these flavors into a more early-afternoon appropriate snack. What could be better than a warm muffin to start my day? I don’t normally eat chocolate this early in the day, but today I made an exception. And after what I tasted when I tried one straight out of the oven, it might just happen more often.

Chocolate-Covered Strawberry Muffins

  • 3 cups flour
  • 4 teaspoons baking powder
  • 1 teaspoon salt
  • 1 teaspoon cinnamon
  • 2 eggs, at room temperature
  • 3/4 cup sugar
  • 1/4 cup light brown sugar
  • 1 cup milk, at room temperature
  • 1/4 cup canola oil
  • 1 teaspoon pure vanilla extract
  • 2/3 cup dark chocolate chips (or semi-sweet)
  • 1 and 1/4 cup fresh strawberries, chopped
  • coarse sugar

Preheat oven to 425 degrees F. Spray a muffin pan with non-stick spray or line with muffin tins. In a large mixing bowl, gently combine flour, baking powder, salt and cinnamon. Set aside. In another bowl, whisk together eggs and sugars until combined. Mix in milk, oil and vanilla. Fold wet ingredients into the flour mixture until just combined, being careful not to over-mix (the batter should be thick and slightly lumpy). Carefully fold in the chocolate chips, followed by the strawberries.

Chocolate Covered Strawberry Muffins I Pretty Little Pastimes

Pour the batter into the prepared muffin pan, filling each cavity to the top. Sprinkle the tops with coarse sugar. Bake the muffins at 425 degrees F for 4 minutes. Keeping the muffins in the oven, lower the temperature to 375 degrees F and continue to bake for 14 additional minutes or until a toothpick inserted in the middle of the muffins come out clean. Remove from oven and allow to cool for 10 minutes.

Chocolate Covered Strawberry Muffins I Pretty Little Pastimes

These muffins will taste best fresh from the oven, but can be stored in an airtight container for up to 5 days. I have some extras in the kitchen and will definitely serve them warm with some vanilla frozen yogurt or fresh whipped cream for dessert later. Enjoy!