5 Tips For Rocking the Job Hunt

5 Tips for Rocking the Job Hunt | Pretty Little Pastimes

Whether you are looking to take the next step in your career, or are ready to jump ship from your current company altogether, searching for new opportunities can be tough and sometimes down right scary. It wasn’t too long ago that I was right there with you, portfolio and resume in hand. Reflecting on that time inspired me to put together a list of little tips that just may get you to that offer letter a little quicker. Here are my 5 tips for rocking the job hunt. #knockemdead

Make the Time

When you are job searching it is very easy to get overwhelmed. You sometimes feel like your full time job is writing and re-writing cover letters. It is a lot of work, but keep at it. Check job posting boards often and act fast when you see something you are interested in. Some positions will get dozens of applications in just a few minutes, so being 200 on the list might mean that your resume is never even opened. Be prepared by having your resume and cover letter templates ready to go. That way you can open one up, personalize it for the specific job (don’t forget this step, personalize, personalize, personalize), and send it off for consideration in no time.

Take the Interview

So you got a call back (yay!), but it’s not for your dream job (boo). You immediately start making excuses for why you shouldn’t go: It’s a waste of time. You wouldn’t take the offer anyway. You never find parking on that side of town. Whatever the excuse is, fight the urge to turn it down. You never know what you might find when you sit down. Perhaps the reservations you had about the position will be resolved, or at the very least you will have one more practice interview under your belt. Going into an interview for your dream job rusty can mean missing the opportunity to really shine. Get some of the jitters out and take notes on what you can improve on. That way when the call comes for a really amazing opportunity you will be prepared and ready to ace it!

Dress for Success (but not in the way you might think)

I’ve been told over and over again in business classes that when stepping into an interview you need to wear “the interview uniform”. Consisting of pulled back hair, a blazer, and sensible shoes, I cringed at the thought. I have a different suggestion. Wear something that makes you feel confident. Of course that doesn’t mean your wedding dress or the skimpy skirt you wore for drinks last weekend. It means pull out that amazing blouse or dress that when you put it on you feel like you’re ready to conquer the office world. For me it is an orange (yes, orange) belted dress from Banana Republic. When you feel great, you carry yourself differently. Your posture improves, your smile is genuine, and who wouldn’t want to leave that impression?

Follow Up

Employers hand out their business cards at the end of an interview for a reason. They want you to use them! Fight the urge to use the generic thank you email and grab your trusty pen and notecards. I know, I know, the thought of handwriting seems foreign in this age of email and text messages, but there is something to be said about a handwritten note received in the mail. In the card thank the interviewer for their time, reiterate your interest in the position, and I also like to add something specific that came up during the interview. Keep it short, energetic, and professional. Drop it in the mailbox within 24 of your interview so it arrives promptly.

Stay Motivated

I’ve been there. You think you have just interviewed for your dream job, nothing else could possibly compare. It’s just perfect. Then you get the dreaded email or phone call … They. Hired. Someone. Else. WHAT? It’s okay to grab that spoonful, or ten, of ice cream and shed some tears. I mean you really wanted it. In fact you already had the paint color picked out for your new office. It’s normal to feel upset and maybe even a little angry, but don’t let yourself wallow too long. Understand that there are a lot of circumstances that could have played into the final decision. One piece of advice, stay respectful and gracious. Thank the company for taking the time to meet with you and let their last impression be a courteous one. And as cliché as it sounds, sometimes things happen for a reason. You might get passed on for one position, only to have another even more perfect position open up for you. You got this.

And the day the job offer does come (and it will come) CELEBRATE and celebrate big! Pop the bubbly; you just started the next step in your career.

Easter Bunny Biscuits for Dogs

Easter Bunny Dog Treats | Pretty Little Pastimes


Before everyone found the last egg in the hunt, I wanted to share with you a recipe that is sure to please that hopping, four-legged, bushy tailed animal that is enjoying Easter right along with you. And, no, I don’t mean the Easter Bunny!

Whenever I celebrate a holiday where I plan to indulge a little, I try to whip up something for my two pups to enjoy right along with me. They share my life each and every day, so why not include them in the joy of holiday festivities? With a quick and simple recipe like my Peanut Butter & Oatmeal Dog Treats (here, with a couple of changes) your dogs will be just as excited to see the Easter Bunny … and not just because they want to chase him around the yard.

Beef & Cheddar Dog Treats

  • 1/2 cup peanut butter *
  • 1/4 cup honey
  • 1 tablespoon olive oil
  • 3/4 cup shredded cheddar cheese
  • 1 cup beef broth
  • 1 cup rolled oats
  • 1 cup whole wheat flour
  • 1 cup unbleached flour
  • 1/4 plain yogurt (optional, for bunny tail decoration)

*Be sure to not use peanut butter containing xylitol. The ingredient is not harmful to humans, but is toxic for dogs.

Preheat your oven to 350 degrees. In a mixing bowl, whisk together the peanut butter, honey, olive oil and beef broth. In a separate bowl, combine the flours, oats, and cheddar. Slowly mix the dry ingredients into the peanut butter mixture until combined. If your dough is too dry add more beef broth one tablespoon at a time.

Easter Bunny Dog Treats | Pretty Little Pastimes

Transfer the dough to a flour dusted surface and roll the dough to about 3/8″ thick. Use a cookie cutter (I used a bunny shape) and cut out your treats. Combine the scraps and keep rolling to get as many treats as you can out of the dough; I ended up with 26. Place the unbaked treats onto a parchment lined cookie sheet and bake for 13-15 minutes. Remove from the oven and transfer to a wire rack to cool completely. Using a small pipping bag, place a small dollop of plain yogurt as a “bunny tail” on each treat. Place the treats directly into the refrigerator until the yogurt is hardened, about 30-45 minutes. Serve chilled or at room temperature (yogurt will remain hardened).

Easter Bunny Dog Treats | Pretty Little Pastimes

My pups love it when the Easter Bunny leaves them some homemade treats in their baskets and I am sure yours will too! Happy Hoppy Easter, everyone!

Easter Bunny Dog Treats | Pretty Little Pastimes


2015 in Review

2015 in Review I Pretty Little Pastimes

2015 was without a doubt one for the record books. It was full of moments that created memories to last a lifetime. I thought I would take a moment to share some of the highlights and look ahead to 2016. Before I do, I want to thank all of the readers who spend time visiting Pretty Little Pastimes and sending me your wonderful messages and comments. Cheers!

In 2015, I had the opportunity to explore new cities and also revisit some old favorites. From Hawaii to Maine and some amazing spots in-between, I took my domestic travel to new places and spaces. I also drove north and spent a lovely weekend with my sorority alumnae chapter in Montreal. Passport + pals + poutine = perfection!

2015 was also a year of challenge. After a long break, I made the leap and started a graduate school program. The thought of trading my guilty pleasure television binges for case studies and group projects was enough to make me ill, but I put my head down and completed the first two semesters of a challenging MBA program. Eye. on. the. prize.

And the most exciting thing to happen in my life during 2015 was … drumroll please … I got MARRIED! After six years of dating, moving across the country twice, and expanding our little family to four with the addition of our two pups, Alex and I exchanged vows in a lovely and intimate ceremony in Santa Barbara, California. It was the most perfect day of celebration and I was so honored to leave my days as a Miss behind for our new chapter as Mr. & Mrs.

Looking ahead to 2016, I have been reluctant to make any formal resolutions. But I have taken the time to think about where I hope this year takes me and the things I hope to accomplish. Here are a couple of those intentions:

Travel: Over the least two years I have made a true effort to spend more time traveling. Life gets busy and distractions come easy, so I have learned to plan ahead. I now start making plans for my next vacation right after I come back from a trip. Not only does this allow for more time to research and save, but it also helps fight the inevitable post-vacation blues. In 2016 we plan to explore Spain and Portugal and I can not wait!

Aside from international travel, I also want to travel to new areas of New England. If my spontaneous cross country moves have taught me anything, it is that you should explore the states and spaces around you, because you never know when an opportunity might come that will having you packing your boxes and relocating somewhere brand spankin’ new and many miles away.

Connect: Don’t let anyone tell you otherwise, planning a wedding is stressful. And planning a wedding from 3,000 miles away is that much more challenging. However, I adored spending so much time with my friends this year while planning for our nuptials. From multiple trips back to California to my bachelorette party in New Orleans, I have seen many of my closest friends more in the last year that I have in the last six. After the wedding, I really got thinking that I need to make more of an effort to stay tightly connected with my friends and not let distance get in the way. Whether it is a quick trip or an actual phone call (do you even remember life before texting?), this year I want to remind my friends how much they mean to me.

Reflect: I don’t plan on starting a journal this year, but I do plan to hit the pause button more often. I am a victim of my own insistence on spreading myself too thin. Call me a glutton for punishment, but I always keep a lot on my plate. I am stubborn and even a weeee bit competitive, so I don’t like saying I can’t do something. But this can get me in trouble. I take on a heavy workload, school load, and even hold leadership positions in multiple volunteer capacities. On top of that I try to live an active lifestyle, travel, and spend time with my little family. Oh yea, and I like to blog.

One thing that 2015 taught me is that I need to slow down. I also need to be able to let the stress come and then let it go! … I’ll give you a minute to finishing singing the Frozen soundtrack … It’s okay to feel overwhelmed, but it’s also okay to accept that you are human. I need to stop, take a deep breath, reevaluate the magnitude of the situation (where does it really measure up in the bigger picture?), and constantly remember that I have one hell of a great life and need to keep smiling.

Push: My plan isn’t to lose weight, or to fit into my high school jeans. Instead I plan to continue to strive for a more healthy lifestyle. The wedding was really a wonderful motivation to fit in my workouts and resist too many sweet treats. Now that the wedding is over, I don’t want to slow down my progress. I won’t say that I was the thinnest I have ever been in my life standing at the alter, but I was certainly the strongest. To say, three decades into my life, that I am the strongest I have ever been is a great accomplishment and one that makes me feel very proud. This year I will work towards bringing down my average mile time, bringing up my weight resistance, and spending more time in the kitchen experimenting with healthy dishes. Recipes to come.

I am truly looking forward to seeing what 2016 brings and I am thrilled you are along for the ride!

Pumpkin Sheet Cake with Cream Cheese Frosting

Pumpkin Sheet Cake | Pretty Little Pastimes

Would you believe me if I told you that I have never had a pumpkin spice latte in my life? It might be hard to accept, but it’s true. I actually gave up drinking caffeine completely more than 5 year ago so I have to pass on the seasonal coffees and teas. But before you start feeling bad for me, rest assured that I make sure to get my all-things-pumpkin fix in during the fall season. I LOVE the time of year when pumpkin flavored treats line the shelves of local grocery stores and bakeries. Then again, who doesn’t?

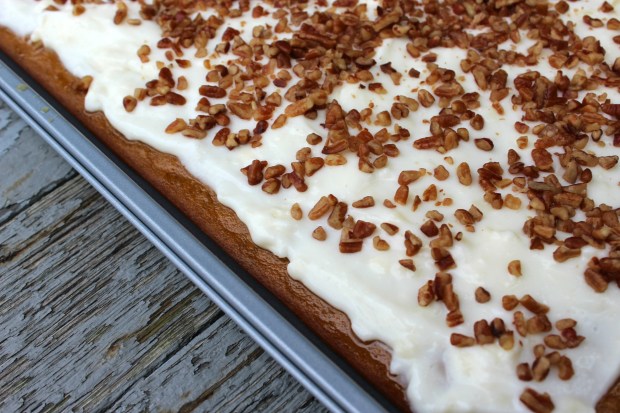
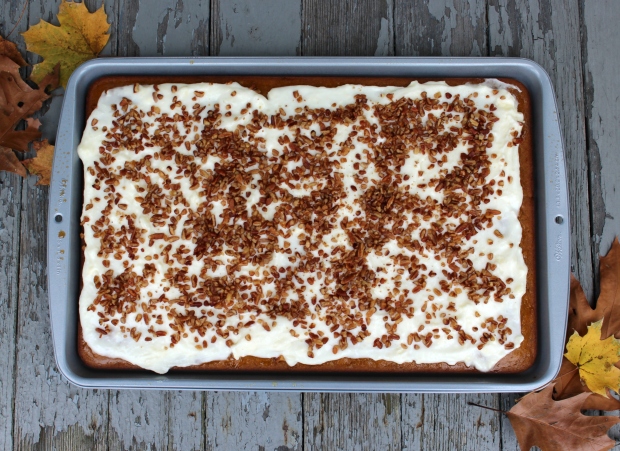
In my last post I shared the recipe for the Nantucket Cranberry Citrus Pie that sat on our dessert table this Thanksgiving. You’ve probably guessed that there was more than one sweet treat sharing the stage and you are right. My husband loves pumpkin rolls and I love cake, so here you have it: Pumpkin Sheet Cake with Cream Cheese Frosting. After all, marriage is all about compromise, right? This Pumpkin Sheet Cake is rich, moist, and has that pumpkin spice flavor no one can’t get enough of during the fall. It is definitely a keeper.

Pumpkin Sheet Cake | Pretty Little Pastimes

Pumpkin Sheet Cake

  • 2 sticks butter
  • 2 cups pure pumpkin puree
  • 2 teaspoons pumpkin pie spice
  • 3/4 cups boiling water
  • 2 cups flour
  • 2 cups sugar
  • 1/4 teaspoon salt
  • 1/2 cup buttermilk
  • 2 eggs
  • 2 teaspoons baking soda
  • 2 teaspoons pure vanilla extract

Cream Cheese Frosting

  • 8 ounces cream cheese, softened
  • 1 stick butter, softened
  • 1 pound powdered sugar, Sifted
  • dash of salt
  • 1 tablespoon milk
  • 3/4 cup chopped walnuts (optional)

Preheat oven to 350 degrees. Spray a 13″ x 18″ sheet pan with baking spray and set aside.

In a medium saucepan, melt 2 sticks butter. Whisk in pumpkin puree and pumpkin pie spice until combined completely. Whisk in boiling water until mixture is smooth and combined. Set aside.

In a small mixing bowl, combine buttermilk, eggs, baking soda, and vanilla. Whisk and set aside.

In a large mixing bowl, combine flour, sugar, and salt. Pour in the pumpkin mixture and stir until halfway combined. Pour in the buttermilk mixture and stir until combined. Pour into the pan and smooth until even. Tap the tray against the counter a few times to release the air bubbles. Bake the cake for 20 minutes. Remove and allow to cool.

To make the frosting, mix together the cream cheese, butter, powdered sugar, and salt until smooth. Add milk and check the consistency. You want it to be thick and smooth, but still thin enough to spread easily over the cake. If your frosting is too thick add additional milk until desired consistency.

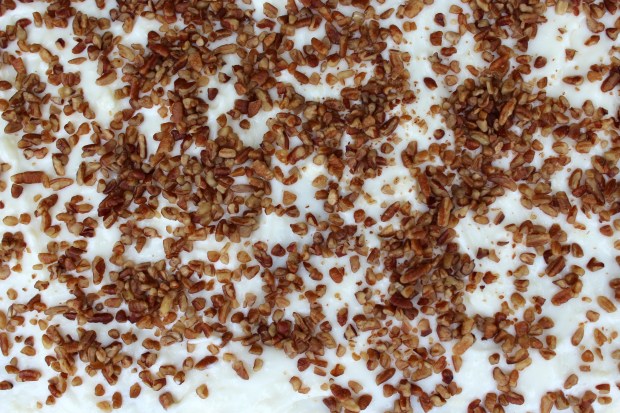
Spread the frosting all over the surface of the cake and sprinkle with chopped walnuts (optional). Cut into squares and serve.

*If you like a very thick layer of frosting, you can easily double the frosting recipe. I actually reserved some of my frosting to top homemade pumpkin cinnamon rolls the next morning. So, so good!

Pumpkin Sheet Cake | Pretty Little Pastimes

The size of this cake is perfect for sharing with friends and family at any holiday gathering. Enjoy!

Nantucket Cranberry Citrus Pie

Nantucket Cranberry Citrus Pie I Pretty Little Pastimes

Thanksgiving is one of my favorite holidays for many reasons. For one, I was born on Thanksgiving, so I kind of think of it as a second birthday (a celebration my parents really never got on board for). Secondly, it’s a day devoted to spending time with family and friends and reflecting on what we are truly thankful for. And, of course, it’s a day where we can wear our stretchy pants and eat all day long without guilt. I LOVE Thanksgiving!

I know some people dread the prep work and cooking, but I actually enjoy it. Since moving away from family, my *now* hubby and I have spent the last three years perfecting our own little Boston Thanksgiving dinner and testing new dishes to put on the “it’s a tradition, we have to make it” list. The main course is pretty solid, so dessert is really where I get to experiment.

One thing missing from our table is cranberry – anything. Walking through the grocery store right before Thanksgiving, cranberries are everywhere! On this year’s pre-Thanksgiving trip I decided to see what all the fuss was about and tossed a bag of fresh cranberries in the cart. I had no idea what I was going to make with them at that point, but was certainly up for the challenge.

I adore extra-tart treats, so this Nantucket Cranberry Citrus Pie definitely hit the spot for me. The crust, which is more cake-like than a traditional pie crust, will really stand out against any apple or pumpkin pie at the table. The addition of citrus zest compliments the cranberries and adds an unexpected pop of flavor. If you prefer sweeter-sweets, just add some whipped cream, ice cream, or honey to the top of the pie before you dig in. Just as the pilgrims would have wanted.

Nantucket Cranberry Citrus Pie I Pretty Little Pastimes

Nantucket Cranberry Citrus Pie

  • 2 heaping cups fresh cranberries
  • 3/4 cup pecans, chopped
  • 3/4 tablespoon orange zest (I used the zest from one clementine)
  • 1 and 2/3 cup sugar
  • 1 cup flour
  • 1 stick unsalted butter, melted + extra for greasing the pan
  • 2 large eggs, lightly beaten
  • 1 teaspoon pure almond extract
  • 1/4 teaspoon salt
  • 1 tablespoon sugar for sprinkling (optional)

Preheat oven to 350 degrees.

Generously butter a pie pan. Add whole cranberries to the bottom of the pan. Sprinkle chopped pecans over the cranberries, followed by 2/3 cup of sugar (it is going to seem like a ton of sugar, but the cranberries are very tart so sprinkle, sprinkle).

In a large mixing bowl, combine the flour, 1 cup sugar, orange zest, melted butter, eggs, almond extract, and salt. Stir gently to combine.

Pour the batter slowly and evenly over the surface of the cranberry, pecan, and sugar layer. Spread out gently if needed.

Bake for 45-50 minutes. 5 minutes before removing from the oven, sprinkle the surface with 1 tablespoon sugar for a little crunch (if desired).

Cut into wedges and serve with fresh whipped cream or a honey drizzle.

Nantucket Cranberry Citrus Pie I Pretty Little Pastimes

And there you have it, a quick, easy, and most importantly delicious cranberry dish for your fall table that isn’t shaped like a can. Enjoy!

Happy 4th of July!

Raspberry Blueberry Scones I Pretty Little Pastimes

Happy Birthday, America; you don’t look at day over 200!

If you are anything like me, than not only do you love a good themed part, but you also LOVE themed baking! I couldn’t resist baking up a little red, white, and blue breakfast to start our Fourth of July celebration. This was my very first attempt at making a homemade scone and it will certainly not be the last. They were flavorful, flakey, and just the right amount of sweetness for me. With a dollop of fresh whipped cream, I would also gobble one of these up for dessert. In fact, I am already thinking about different flavor combinations I can bake up in the future … orange blueberry, cranberry almond, chocolate-anything … yum!

Red Raspberry & Blueberry Scones

  • 2 cups all purpose flour (reserve a little extra for work space)
  • 1/2 cup granulated sugar
  • 1 tablespoon baking powder
  • 1/4 teaspoon salt
  • 1/2 cup unsalted butter
  • 1 large egg
  • 1/2 cup sour cream (or Greek yogurt)
  • 1 teaspoon pure vanilla extract
  • 1/2 teaspoon almond extract (optional)
  • 1/2 cup of fresh raspberries, halved
  • 1/2 cup of fresh blueberries
  • 1 tablespoon lemon zest (optional)
  • natural honey drizzle (optional)

Preheat oven to 400 degrees. In a large mixing bowl, whisk together the flour, sugar, baking powder, and salt. Add the butter and cut into mixture. I use two forks to break up the butter and then my hands to further knead it in. Don’t worry about catching every small piece of butter, some larger pieces are just fine.

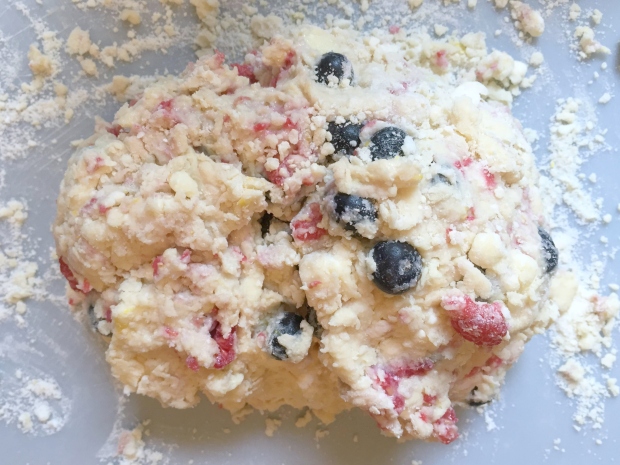
In a small mixing bowl wish together the egg, sour cream (or Greek yogurt), vanilla extract, and almond extract until smooth. Pour the wet ingredients over the flour mixture. Fold until just combined, being careful not to over mix. Gently fold in the berries and lemon zest.

Sprinkle flour onto your work station and turn the dough onto the surface. Knead it into an 8-inch round. If the dough is too wet to work with, add a little more flour. If it is too dry, add a small splash of milk.

With a large knife, slice the dough into 8 equal sized pieces (like a pizza). Using a flat spatula, transfer the wedges to a baking sheet lined with parchment paper. Make sure dough is at least 2 inches apart to allow for the dough to spread while baking.

Bake for 15-18 minutes or until very lightly golden. Allow scones to cool for 5 minutes and then transfer to a wire cooling rack. Once cooled (if they last that long), drizzle with a little all natural honey and enjoy!

Raspberry Blueberry Scones I Pretty Little Pastimes

Raspberry Blueberry Scones I Pretty Little Pastimes

Wishing each of you a very Happy Fourth of July!

Pitaya Superfruit Smoothie

Pitaya Smoothie I Pretty Little Pastimes

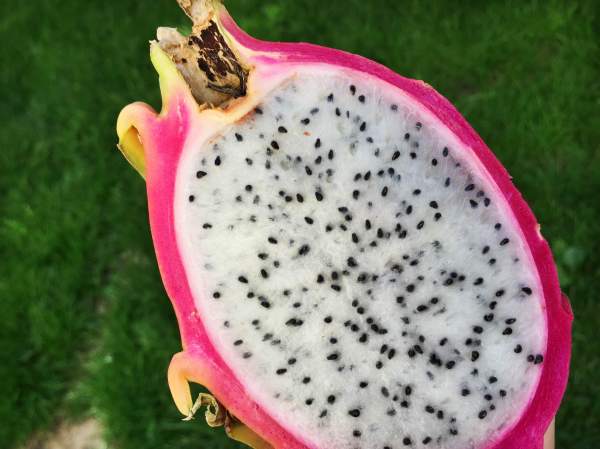
If you are lucky enough to pass by fresh pitaya at your local grocery store or market, stop immediately! Grab one of those vibrant beauties and put it in your basket! This superfruit is not only packed with antioxidants, it also carries a slew of vitamins and minerals. And don’t let the color or prickly skin fool you, the taste is actually quite mild (think kiwi) and is perfect to add to your favorite smoothie/breakfast bowl recipes.

When shopping for pitaya, commonly referred to as dragon fruit, choose a fruit that is vibrant and gives slightly to pressure. It can be a little tricky to find, but is usually kept in the exotic fruit section in the produce department. Similar to acai, food markets are now selling frozen packs as well. Keep an eye out!

Pitaya Superfruit Smoothie

  • 1 ripe pitaya
  • 1 small ripe banana
  • 1/2 cup mango
  • 4 ounces pineapple juice
  • 4 ounces coconut milk
  • drizzle of natural honey (optional)

Place all ingredients in a high speed blender (liquids first) and blend until smooth. Yep, that’s it! Transfer to your favorite glass or tumbler and serve immediately.

*If you prefer a thinner smoothie, simply add additional pineapple juice. If you like it thicker, add another handful of fruit.

There is nothing like feeling energized and refreshed after nourishing your body with something healthy AND tasty. Whether you add it into your breakfast routine or use it to recharge after a long workout, this pitaya smoothie is a must try. Enjoy!

National Peanut Butter Lover’s Day 2015

Peanut Butter Chia Overnight Oatmeal I Pretty Little Pastimes

It’s that time again! The day is here that we get to set aside special time to celebrate the creamy (or crunchy) wonder that is PEANUT BUTTER! I was scratching my head Saturday night thinking of a way to incorporate my favorite all-natural peanut butter into my breakfast routine. So I decided to mix it into some oatmeal and voila! Peanut Butter & Chia Overnight Oats. Enjoy!

Peanut Butter & Chia Overnight Oats

  • 2/3 cup skim or almond milk
  • 1/4 cup steel cut oats
  • 1 tablespoon chia seeds
  • 1 and 1/2 tablespoons peanut butter
  • 1/4 teaspoon pure vanilla extract
  • 1/2 teaspoon honey
  • fresh blueberries or banana

Mix together the milk, oats, chia, vanilla and one tablespoon of peanut butter and place in the refrigerator overnight (or at least 4 hours). In the morning stir to incorporate and top with remaining peanut butter, honey and fresh fruit. I packed mine in a mason jar so it I could grab it on my way out the door.

Bonjour, 2015!

Engaged in Paris!

2014 was jam-packed with some amazing moments. I traveled to Europe for the first time, I landed an exciting new job, and met some remarkable people along the way. BUT, of all the moments I experienced, this was by far my favorite! There may only be one thing that could top getting engaged in Paris and that is becoming a Mrs. to my wonderful Mr. Here’s lookin’ at you, 2015!

Wishing each of you the happiest of New Years!

As I prepare for the Big Day, I will be sharing some fitness tips, DIY projects and wedding planning tips right here. Thank you for following along!

Pumpkin Butterscotch Snickerdoodles

Pumpkin Butterscotch Snickerdoodles

Pumpkin Butterscotch Snickerdoodles

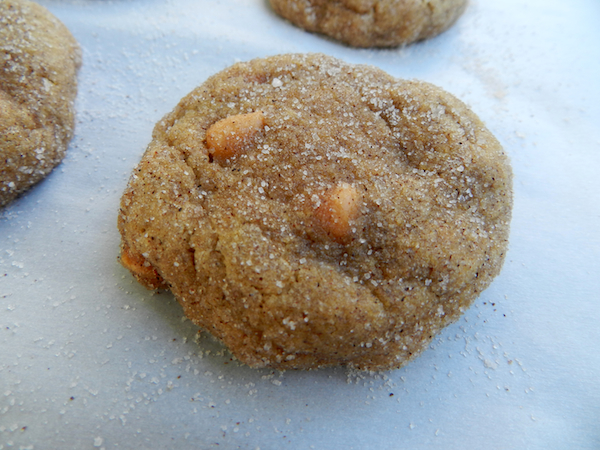
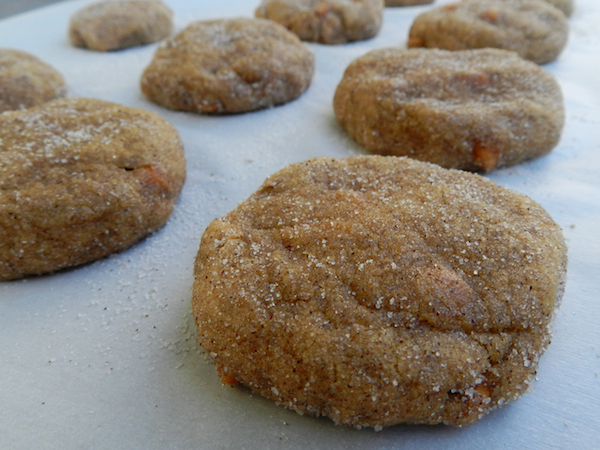
Happy first day of October everyone! If you are like me, than you try to hold on to summer just as long as you can. Unfortunately, for us on the East Coast summer came late and fall didn’t follow in suit. But now that it is officially October (and fall) I am gearing up for my favorite season, full of baking, decorating and holiday celebrations! I thought it would be appropriate to kick off the season on Pretty Little Pastimes with a pumpkin cookie recipe. While the lines grow longer for PSL’s, non-caffeine drinkers like me have to get their pumpkin fix in other ways. So, I present to you the Pumpkin Butterscotch Snickerdoodle! Fluffy, sweet and full of fall flavors, this has to be one of my top five cookies of ALL TIME! I hope you love them as we do. Enjoy!

Pumpkin Butterscotch Snickerdoodles

  • 1/2 cup unsalted butter, melted
  • 1/4 cup light brown sugar
  • 1 cup granulated sugar
  • 1 and 1/4 teaspoons pure vanilla extract
  • 6 tablespoons pumpkin puree
  • 1 and 1/2 cups flour
  • 1/4 teaspoon salt
  • 1/4 teaspoon baking powder
  • 1/4 teaspoon baking soda
  • 2 and 1/2 teaspoons ground cinnamon
  • 1 teaspoon pumpkin pie spice
  • 1/2 cup butterscotch chips

In a medium bowl, whisk together the melted butter, brown sugar and 1/2 cup of sugar together until no lumps remain. Whisk in the vanilla and pumpkin puree until smooth. Set aside.

Pumpkin Butterscotch Snickerdoodles

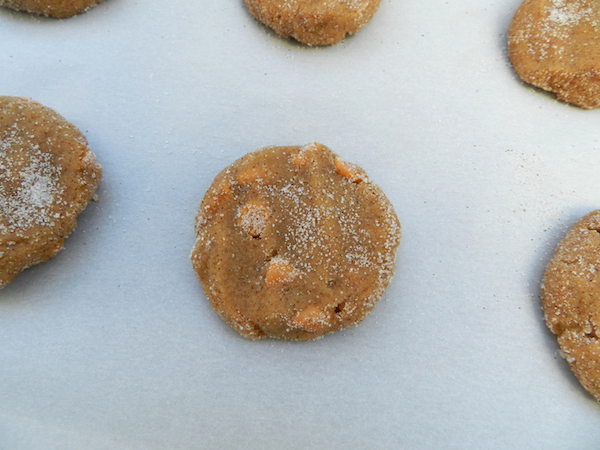
In a large bowl, toss together the flour, salt, baking powder, baking soda, 1 and 1/2 teaspooons cinnamon and pumpkin pie spice. Pour the wet ingredients into the dry ingredients and mix together with a rubber spatula. Fold in the butterscotch chips. Cover the dough and let chill for at least 30 minutes. This is an important step, so don’t skip it!

Preheat your oven to 350 degrees. Take the dough out of the refrigerator. Line two large baking sheets with parchment paper.

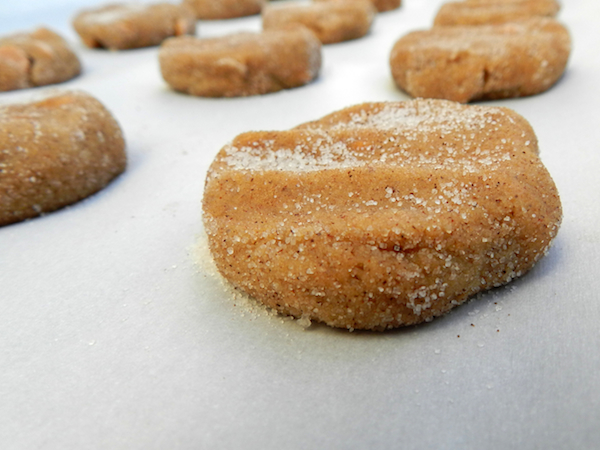
Roll the dough into balls (about 1/2 tablespoons each). Mix together the remaining 1/2 cup sugar and 1 teaspoon cinnamon. Roll each of the doughballs generously in the cinnamon-sugar mixture, coating all sides. Arrange on the two baking sheets. Slightly flatten the dough balls, as the dough will not spread much while cooking.
pumpkin butterscotch snickerdoodles I Pretty Little Pastimes

pumpkin butterscotch snickerdoodles I Pretty Little PastimesBake for 8-10 minutes. Remove from oven and allow the cookies to cool for at least 10 minutes before transferring to a wire rack. You can store at room temperature for up to one week … but they NEVER last that long!

Pumpkin Butterscotch Snickerdoodles


Follow along for more fall-inspired treats this season!